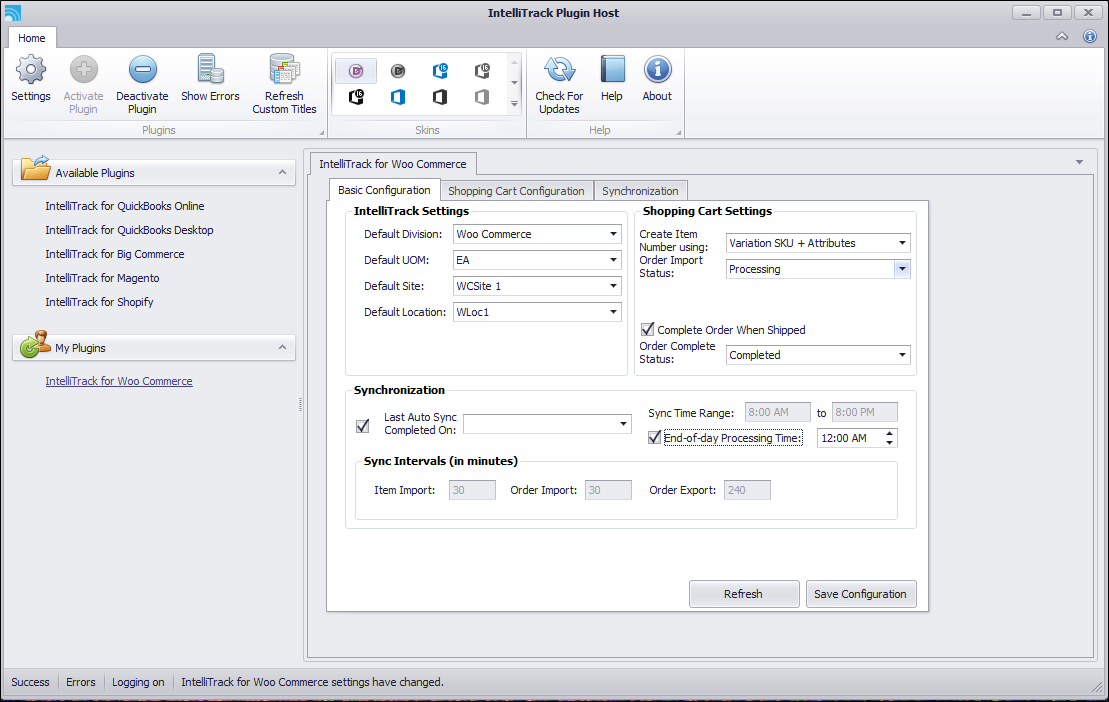
IntelliTrack for WooCommerce Shopping Cart Configuration
The WooCommerce shopping cart is configured to integrate with IntelliTrack at this tab. You must have your shopping cart configured in order to use the plugin.
Store Key Setting
The Store Key setting integrates your store with IntelliTrack. IntelliTrack will provide you with this setting.
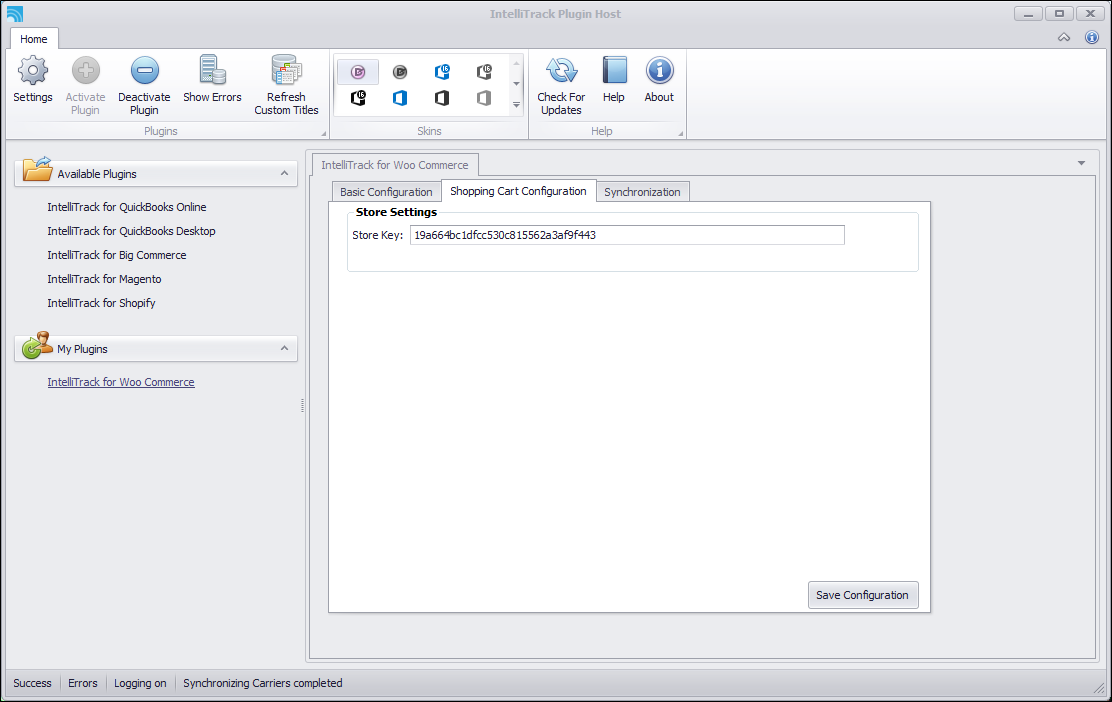
Important: IntelliTrack will set up the WooCommerce store key in the Store Key field so that your store integrates with the IntelliTrack app.
Note: We recommend that you make a copy of your Store Key and keep it available in case you want to move your Plugin Host Utility to another PC.
Importing WooCommerce Data Into IntelliTrack
After the store key is configured and you have entered the settings at the Basic Configuration tab, you are ready to import the WooCommerce data into IntelliTrack. Before you begin using the plugin to share order and inventory data between WooCommerce and IntelliTrack, you must establish the dataset by importing the WooCommerce data into IntelliTrack. This process depends on your IntelliTrack for WooCommerce feature access.
- IntelliTrack for WooCommerce Feature: The initial dataset is established from the Shopping Cart Configuration tab.
- IntelliTrack for WooCommerce Manual Sync: The initial dataset is established from the Synchronization tab.
Important: Before importing the WooCommerce data into IntelliTrack, make sure the Default Division, Default UOM, Default Site, Default Location are selected in the Basic Configuration tab. Also, select the way you want the WooCommerce products to be created in IntelliTrack via the Create Item Using selections in the Basic Configuration tab.
IntelliTrack for WooCommerce Feature
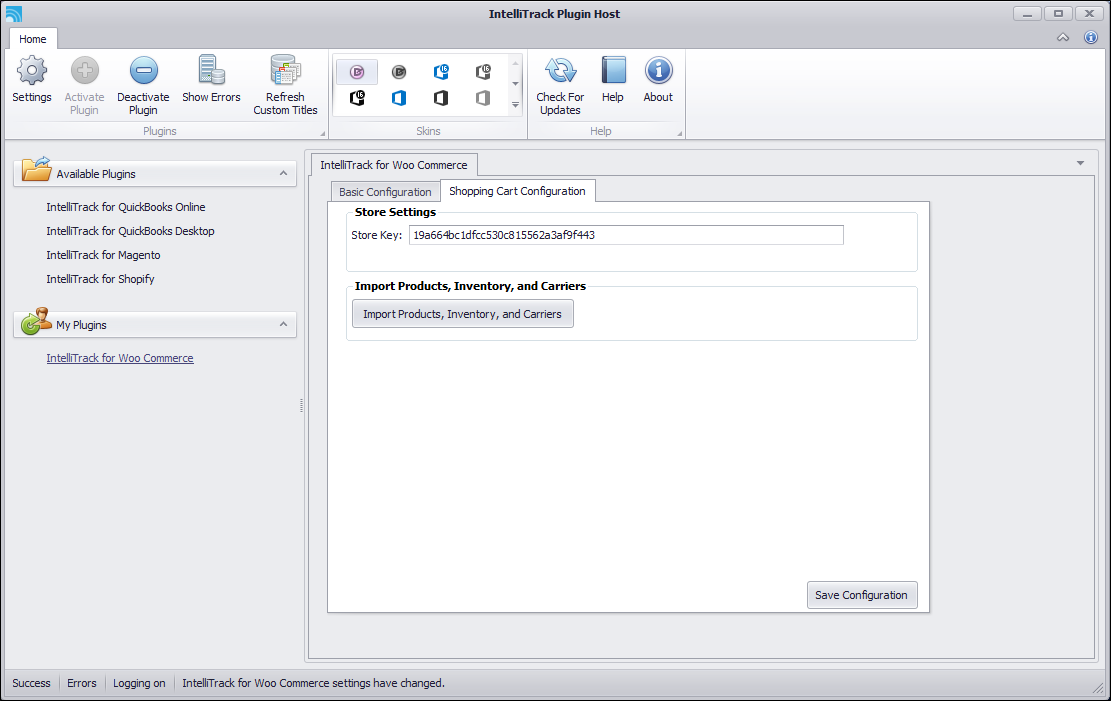
When you have the IntelliTrack for WooCommerce feature, the Import Products, Inventory, and Carriers button at the Shopping Cart Configuration tab is used to establish the initial dataset between WooCommerce and IntelliTrack. This button becomes enabled after IntelliTrack sets up your store key.
Note: This button is not available if the IntelliTrack for WooCommerce Manual Sync feature is being used. When the IntelliTrack for WooCommerce Manual Sync feature is being used, the initial data import is done from the Synchronization tab.
This button imports the WooCommerce products, inventory, and carriers into IntelliTrack.
- Make sure your Default Division, Default UOM, Default Site, and Default Location are selected in the Basic Configuration tab. Also, make sure you have selected the way you want IntelliTrack to create the item number from the WooCommerce product via the Create Item Number Using field list options.
- Click the Import Products, Inventory, and Carriers button to import this data into the specified IntelliTrack division.
- When the Auto Delete Inventory Records with 0 Quantity is ON for the site, the on hand quantity of the item must be greater than zero in order to be imported into IntelliTrack inventory.
- The inventory is placed in the division-site-location specified in the Basic Configuration tab\IntelliTrack settings.
- The products, inventory, and carriers should only be imported one time, so after you import them, this button becomes disabled.
- Log into IntelliTrack and verify that the items, inventory, and carriers have been imported into it. Once verified, you are ready to start using the plugin to process orders and inventory.
Enabling Auto Sync
When you enable auto sync, the item and order data are synced between IntelliTrack and WooCommerce at preset time intervals. The inventory adjustments are exported from IntelliTrack to WooCommerce once a day at a preset time.
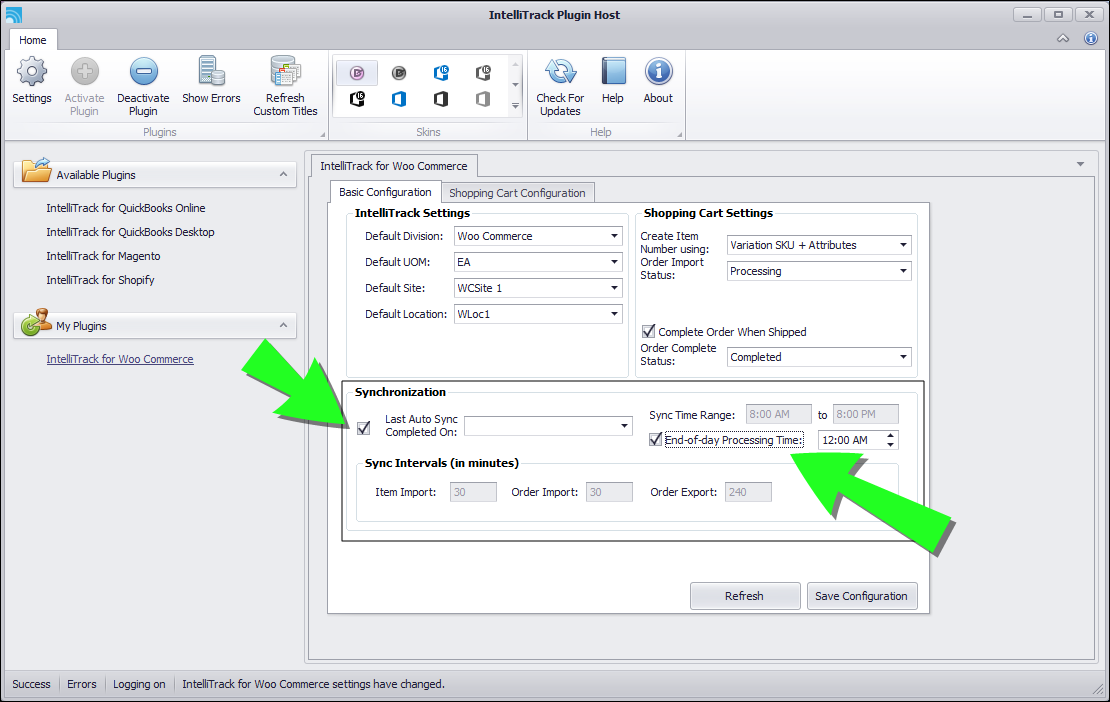
- To enable auto sync, go to the Basic Configuration tab and mark the Last Auto Sync Completed On check box.
- The auto sync will run at preset intervals based on a timer setting.
- This field is blank when the first auto sync is run so that items, orders, and customers are imported.
- After the first auto sync, a date-time stamp is automatically entered in this field after each sync is completed. Any data that has been updated since the last sync date-time is synced.
- End of Day Processing Time checkbox and field: Mark the End of Day Processing Time checkbox and enter a time in the End of Day Processing Time field to process the inventory adjustments. At the time specified, the inventory count for each item is exported automatically based on the End of Day processing timer setting. When the End of Day processing is run, it retrieves the current inventory quantity for each item and sends it to WooCommerce.
- Press the Save Configuration button to save your settings.
IntelliTrack for WooCommerce Manual Sync Feature
When you have the IntelliTrack for WooCommerce Manual Sync feature, use the Synchronization tab to establish the initial dataset. This tab becomes enabled after IntelliTrack sets up your store key.
Important: The Synchronization tab is only available when you have the IntelliTrack for WooCommerce Manual Sync feature.
- Make sure your Default Division, Default UOM, Default Site, and Default Location are selected in the Basic Configuration tab. Also, make sure you have selected the way you want IntelliTrack to create the item number from the WooCommerce product via the Create Item Number Using field list options.
- Select the Synchronization tab to bring it to the front.
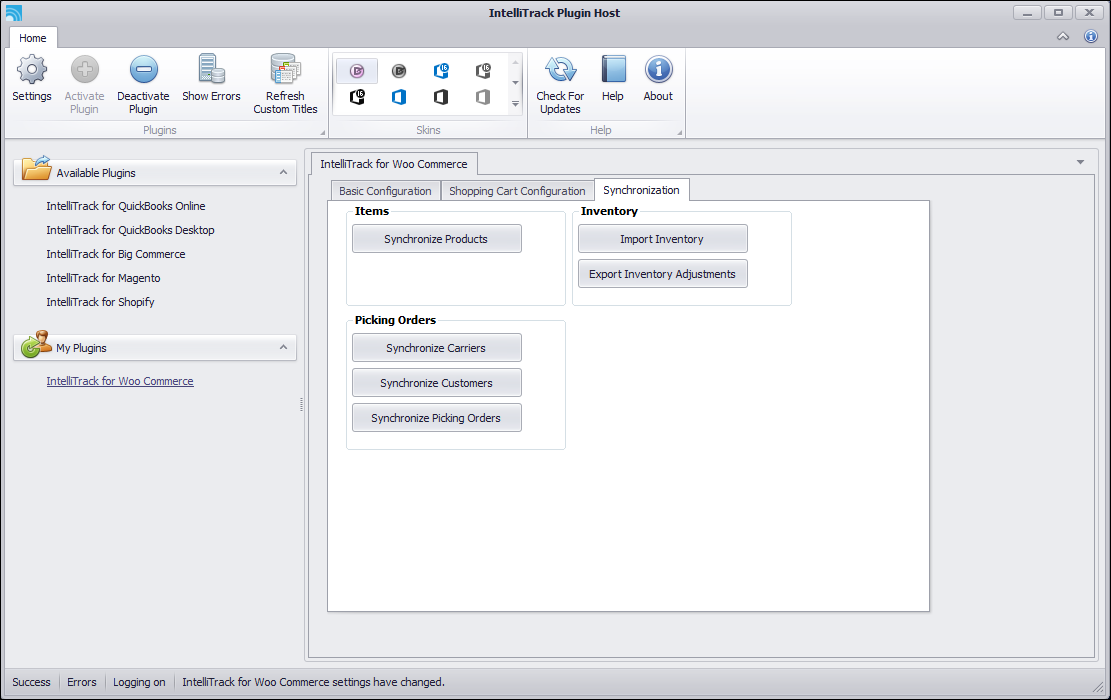
- Synchronize Products button: click to import the WooCommerce products into IntelliTrack.
- Import Inventory; button: click to import the WooCommerce inventory into IntelliTrack.
- Inventory should only be imported one time to establish the initial inventory dataset; so, once you import the inventory, the Import Inventory button becomes disabled.
- When the Auto Delete Inventory Records with 0 Quantity is ON for the site, the on hand quantity of the item must be greater than zero in order to be imported into IntelliTrack inventory.
- Synchronize Carriers button: click to import the Carriers from WooCommerce into IntelliTrack.
- Synchronize Customers button: click to import the Customers from WooCommerce into IntelliTrack.
- Synchronize Picking Orders button: click to import the picking orders from WooCommerce into IntelliTrack.
- The status bar along the bottom of the Plugin notifies you when the import is complete.
- Log into IntelliTrack and verify that the items, inventory, carriers, customers, and picking orders have been imported into it. Once verified, you are ready to start using the plugin to process orders and inventory.
Enabling Auto Sync
When you enable auto sync, the item and order data are synced between IntelliTrack and WooCommerce at preset time intervals. The inventory adjustments are exported from IntelliTrack to WooCommerce once a day at a preset time.
- To process orders, go to the Basic Configuration tab and mark the Last Auto Sync Completed On check box to enable auto syncing.
- The auto sync will run at preset intervals based on a timer setting.
- This field is blank when it is first enabled. When this field is blank (cleared), all customers and any unfulfilled orders are imported into IntelliTrack.
- After each auto sync, the date-time field will be updated with the date-time of the last auto sync. Any data that has been updated since the last sync date-time is synced.
- Enter a time in the End of Day Processing Time field to process the inventory adjustments.
- A snapshot of your inventory is automatically exported to WooCommerce, once a day, at this time: this includes the inventory count for each item.
- Press the Save Configuration button to save your settings.